Making Caddo Pottery
|
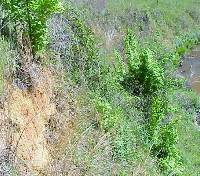
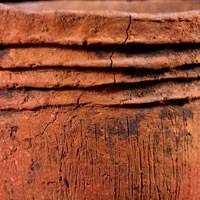
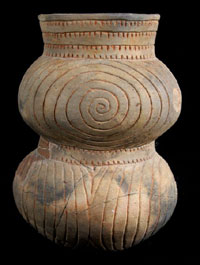
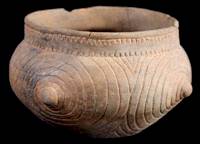
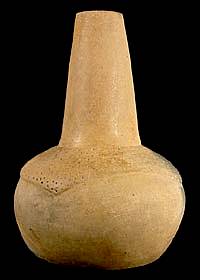
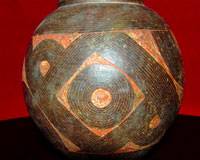
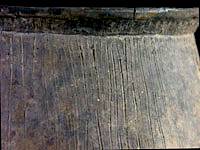
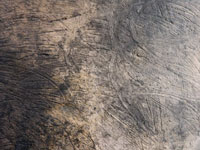
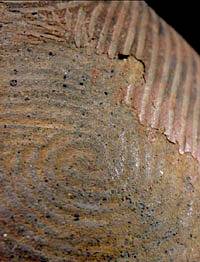
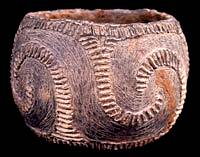
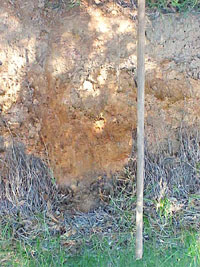
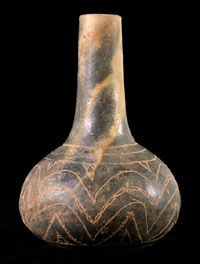
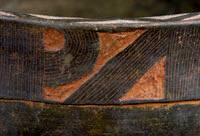
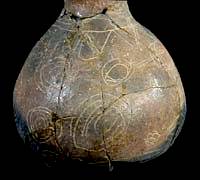
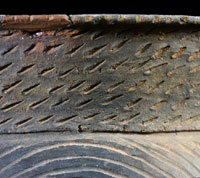
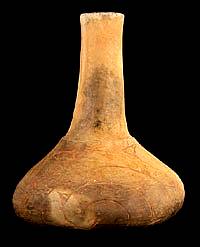
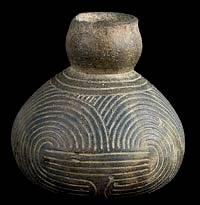
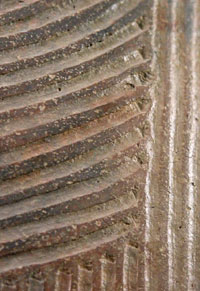
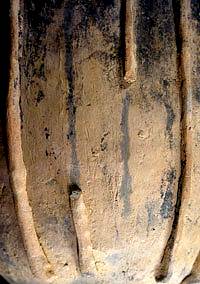
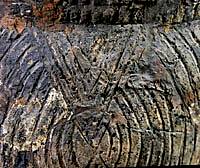
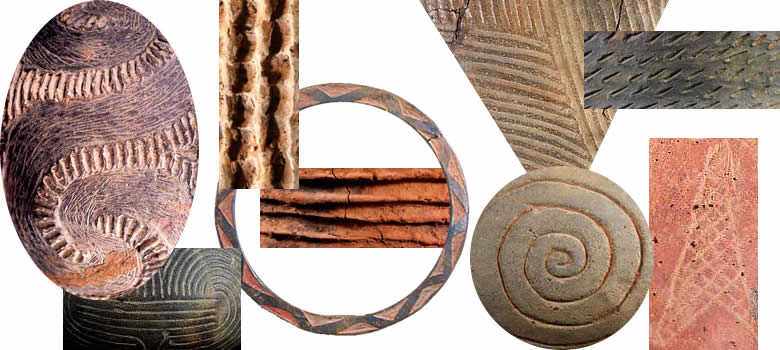
Today pottery making thrives as a hobby, as an industry, and as a form of artistic expression. Hundreds of books, films, and websites exist that explain ceramic technology and pottery-making techniques. But for those unfamiliar with the basic process and those interested in the specific techniques favored by the ancient and modern Caddo, here is a quick review. The earthenware pottery made by the ancient Caddo was made by hand using locally available materials and fired in an open fire (as opposed to a kiln) at relatively low temperatures (perhaps 600-700 degrees centigrade). Clay deposits suitable for making pottery occur widely within the Caddo Homeland. In most areas clay could be obtained easily from bluff exposures along rivers and streams or by digging relatively shallow pits. Some clay deposits are better suited for pottery making than others because they contain fewer impurities or have useful properties such as the right degree of plasticity (how easily wet clay can be shaped). Judging from the copious quantities of Caddo pottery and from the high quality of much of it, Caddo potters knew well where to find the proper clays and how to prepare them. Pure clay mixed with the right amount of water is plastic (pliable) and can be easily formed into most any shape. But most wet clays are so plastic that they won't hold a shape for long before sagging and, as the clay dries, it tends to crack. A further problem is that wet clay is very tacky and sticks to everything. Like potters the world around, Caddo potters routinely solved these problems by adding temper (non-plastic particles) to their clays to help control the plasticity, to prevent drying cracks, and, in some cases, to make their cooking pots withstand heat better. For instance, relatively coarse temper was usually added to clays used to make cooking vessels because the larger particles help the pots take heat better than fine particles. The favored tempering agent was grog (crushed potsherds). Burned and pulverized animal bone was also used; burning is necessary in order to crush the bone properly. After about A.D. 1300, burned and crushed mussel (freshwater clam) shell was used as a temper by Caddo potters living along the Red River and certain other areas. With practice, a potter learns just how much of what kind of temper to add to create proper potter's clay. Once the clay mixture (paste) was ready, most Caddo pottery was made using the coil method. First a flat disk was formed that would serve as the base of the vessel. Rope-like fillets of clay were then gradually coiled around the disk and mashed together to form the vessel walls. The vessel walls were thinned, smoothed, and compacted by the use of fingers, smooth river pebbles, shaped sherds, or other tools. Redcorn uses dried gourds of various sizes as anvils that she holds on the inside of a pot while she applies a wooden scraper or wooden paddle on the outside to weld the coils together, compact the clay, and form a smooth, even surface. An experienced potter can make a simple bowl rather quickly, in less than an hour. Large or complicated vessels take many hours or even days to make because of the need to let the lower parts partially dry before they are strong enough to add the upper parts. When making larger pots with several different parts (like long-necked bottles or vessels with tripod feet), Jereldine Redcorn finds it best to "put it [the half-made pot] away for a few days. When you come back to it, all of the sudden it is wonderful." What she means is that curing the still-damp pot (she wraps hers in a plastic bag) makes it easier to work with when adding on necks and other elements. "The clay remembers," she says, and holds its form. She suspects ancient Caddo potters did the same thing, perhaps by wrapping their pots in wet animal skins. "You can make some pots much quicker, by just keeping at it, but it's hard to get wet clay to behave the way you want it to." Finishing the form of the pot is only the first step. Caddo potters seemed to have delighted in finishing and decorating their pots in many different ways. While the pot was still damp, the surface was sometimes textured by brushing (useful for making water jars and cooking vessels less slippery) or by pinching it to form ridges. Other favored decorative techniques at this stage included the use of a thin, sharp tool (like a flint flake) to incise narrow lines, pointed sticks to incise broader lines or create deep punctations, fingernails to create curving impressions, and hollow pieces of cane or reed to create small circles. Another technique used in later prehistoric times involved the addition of small shaped clay fillets (appliqué) or protruding "nodes" of clay on the outside of the vessels to create raised relief. Then the vessel was allowed to dry to what potters call the green-ware stage. For the finer vessels, a second thin layer of fine, untempered clay mixed with a red pigment called a slip was sometimes added at this stage. The slip layer gave the vessel a smooth, uniform appearance and sometimes a more desirable color. Redcorn adds really fine clay slips to most of her pots to enable her to create highly polished, mirror-like finishes that those who buy her pottery seem to prefer. Ancient Caddo potters, however, usually stopped well short of achieving highly polished surfaces. When the pot is completely dry (or almost so), the green-ware vessel is burnished by wetting small areas of the outer surface and rubbing the outside of the vessel with a small smooth river pebble. This is a tedious and slow process, but one that results in a vessel that has a lustrous appearance and a harder and less porous exterior surface. Burnishing was usually done in parallel strokes, up and down or side to side, leaving parallel burnishing marks and a slightly uneven surface. If the potter was willing to work hard enough and long enough, the burnishing marks could be obliterated and the surface would become completely smooth and highly polished. Jereldine Redcorn found that learning how to properly burnish a pot was one of her biggest challenges. Trials and errors later, she now understands that burnishing must be done as a single step without stopping. It takes her an hour to an hour and a half to burnish a medium-sized bottle. She paints on small patches of watery clay slurry and burnishes these quickly, adding one finished patch to the next so she can make the burnishing look seamless. Once the green-ware pot is completed and allowed to thoroughly dry for several days, it is ready to fire. Ancient Caddo pottery was apparently fired in an open bonfire, probably fueled by wood and brush. Like most traditional potters, the Caddo women probably fired more than one pot at a time. Whether the pots came out with clear, bright, oxidized colors (red, yellow, light brown) or dark, dull, reduced colors (gray, black) depended on how hot the fire was and on the placement of the pots. (Clay type also factors in to final color.) If the pots stayed hot after most of the fuel had burned up, thus allowing air to reach the pots, they would become oxidized. If the pots cooled while still covered by ash or up against another pot, then they would have fire clouds and dark colors. Redcorn likes to fire her pottery at a somewhat higher temperature that her ancestors, in part because she usually uses a higher quality commercial clay than her forebearers had access to. She fires up to 15 pots at a time in a large metal barrel filled with seasoned oak for intense heat and some fast-burning wood like pine to get things going quickly. Her resident "wood expert," husband Charles Redcorn, gathers and prepares the wood. He also helps her stack the pottery on different levels within the big barrel to keep the pots from touching one another, to eliminate most fire clouds. When she wants a black finish, she pours in a mix of sawdust and powdered manure at the end of the firing to smother the fire and create a reducing atmosphere. After firing, ancient Caddo potters apparently engraved some of their pots using a sharp flint tool like those used for incising. Engraving leaves slightly rough-edged marks that cut through rather than displace the outer layer of the pot through the slip (if present). In contrast, incision and punctation displaces the still-damp clay and leaves tiny ridges where the clay is pushed up. The Caddo potters seem to have been very fond of incising and engraving. They found many different ways to create pleasing decorative effects by incising or engraving lines of different widths and depths, adding tick marks, cross-hatching, parallel lines, curvilinear patterns, and so on. To make the incised and engraved designs stand out, the potters often rubbed mineral pigments, such as red ochre or white kaolin clay, into the designs. Jereldine Redcorn engraves her pottery after it is polished and thoroughly dried, but before it is fired. Some archeologists think the ancient Caddo did it that way too, although others hold that engraving was done after firing. Perhaps it is mainly a question of firing temperature and hardness. Vessels fired at higher temperatures are just too hard to engrave, according to Redcorn. Becoming proficient at engraving was the hardest thing she had to learn. She used bone awls at first, but they kept wearing out and constantly needed resharpening. Pieces of flint work, but are hard to hold on to. So today she usually uses a metal awl. Part of the challenge of engraving is simply to create nice even lines, particularly when they are closely-spaced. She finds cross hatching to be "very tedious" and has learned to take frequent breaks to let her hand rest. But the real art of engraving lies in planning and executing the design. For the first few years, Redcorn "tried too hard." She wanted to make her designs perfectly symmetrical and spent a lot of time trying to lay out each design (with a pencil) before beginning engraving. With experience she has learned "to just let things flow." She may trace out the major design elements, but once she starts she does not try to make it perfect, "just look good." Once she has used a design enough times, "it becomes mine" and she no longer has to think so hard about it. "I've learned to see the whole picture, the whole design, and adapt it to fit each pot." The photographs accompanying this exhibit illustrate these and some of the other variations and techniques used by Caddo potters of yesterday and today. |
|